Amazon AWS Cloud Platform provides rich set of high-performance NVMe resources for building true enterprise-class NVMe Over Fabrics readily. Please note that the network bandwidth is tied to the number of cpu cores of the compute instance. The storage IOPS is based on capacity of provisioned storage. Please refer to AWS cloud documentation for more information on storage optimized instance types.
| Purpose | Machine | Cores | Memory | Network | Storage |
|---|---|---|---|---|---|
| Shared block storage for IP-SAN or NVMeoF | Storage Optimized i3.xlarge Other i3 series | 4 | 30.5GB | ~10Gbps | Ephemeral direct NVMe or SSD 1 x 950 |
| High Performance NFS Server | Storage Optimized i3.2xlarge i2.2xlarge | 8 | 61GB | ~10Gbps | zpool 1 x 1900 (NVMe) 2 x 800 (SSD) |
| High-Availability | High Availability Set | Secondary Private IP address | Synchronous mirroring by using zpool mirror dm raid-1 over NVMe target DRBD replication |
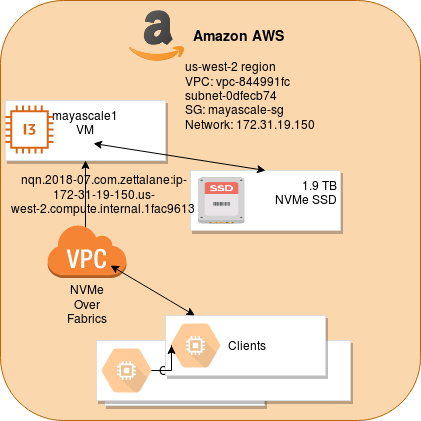
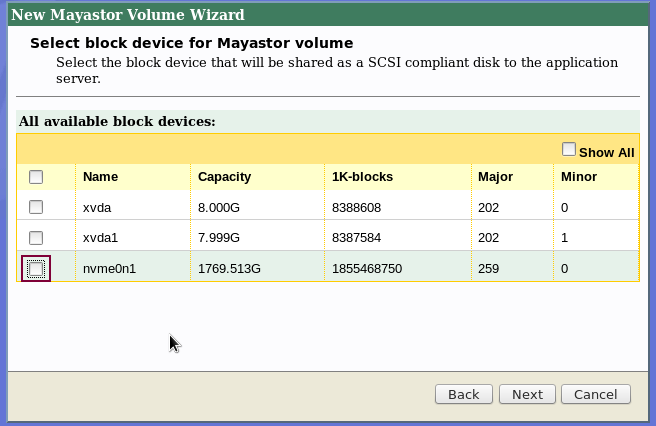
Here is the sequence of steps involved in experiencing the industry's very first elastic NVMe after you've deployed a MayaScale instance from AWS marketplace. In this tutorial we will assume you have launched EC2 i3-xlarge instance type that comes with 1 x 1.9T NVMe SSD.
- 1 EC2 instance
mayascale1 - 1.9 TB NVMe SSD (ephemeral)
- Default network with private IP 172.31.19.150 (ip-172-31-19-150.us-west-2.compute.internal)
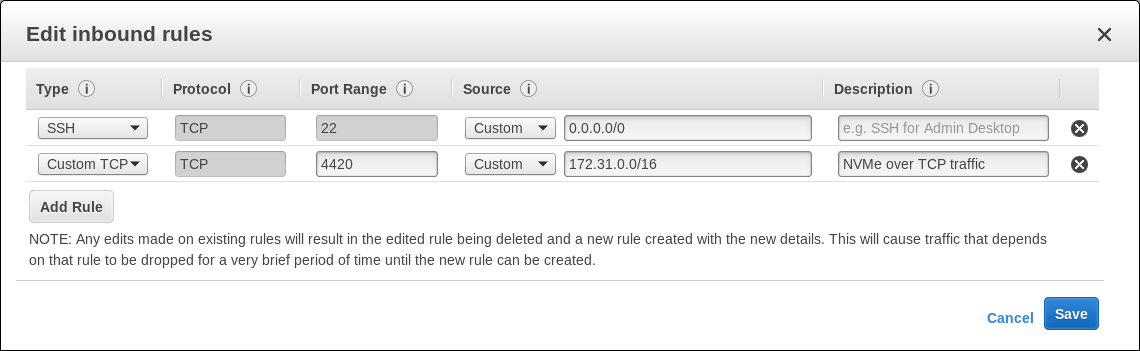
- Permit port 4420 which is the default port for NVMeoF TCP traffic
Connect to mayscale instance using SSH to secure the Web console GUI access by changing the default password to something random by running
# /opt/mayastor/web/genrandpass.sh
Or to set your own password
# /opt/mayastor/web/changepass.sh
Login name (default admin):
Login password:
Password again:
And then restart the web server for password changes to take effect
# /opt/mayastor/web/stop

# /opt/mayastor/web/start
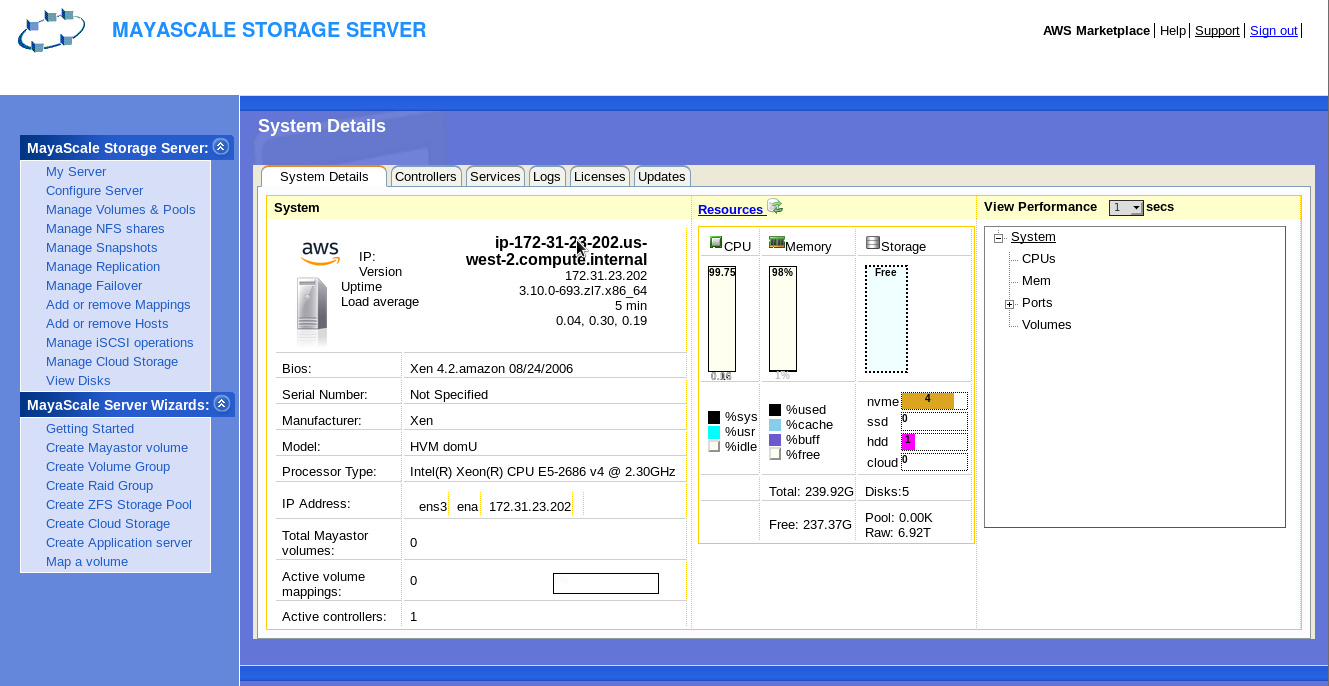
Now you can proceed with provisioning NVMe storage using the Administration Web console available on http://<mayanas-ip>:2020
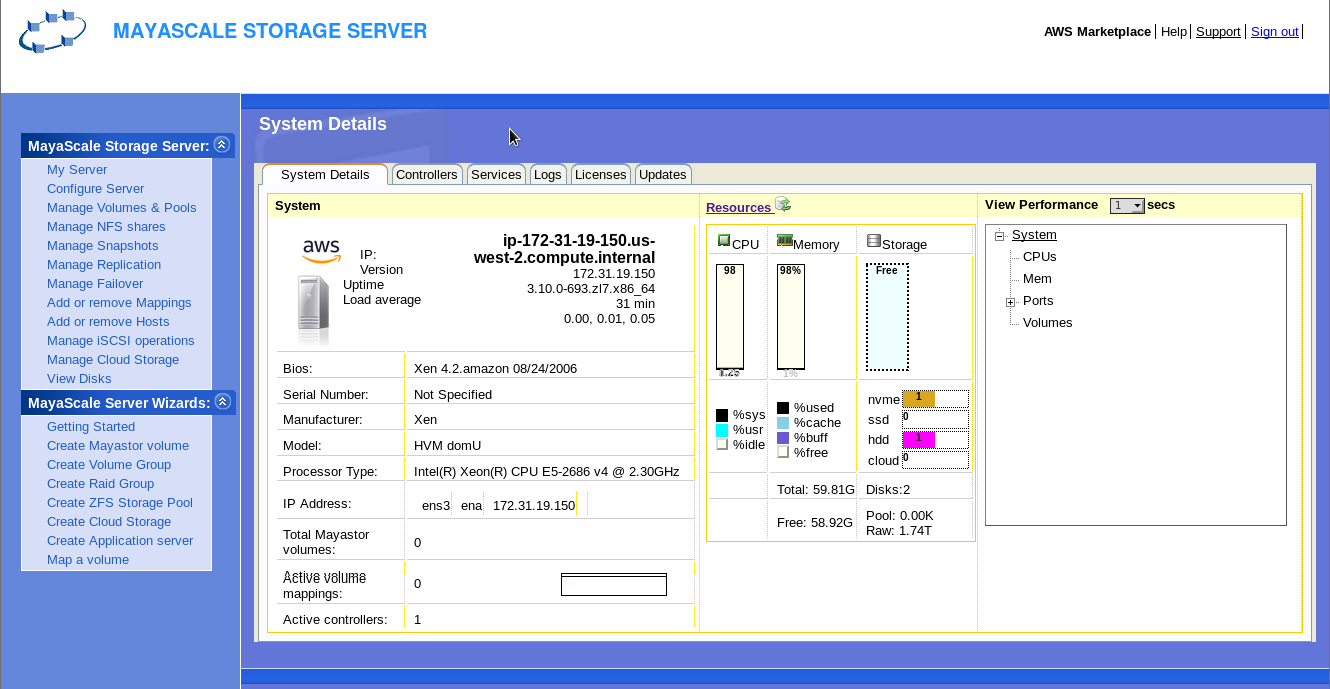
Based on the number of NVMe SSD that is available on the instance you will be able to view them on the GUI.
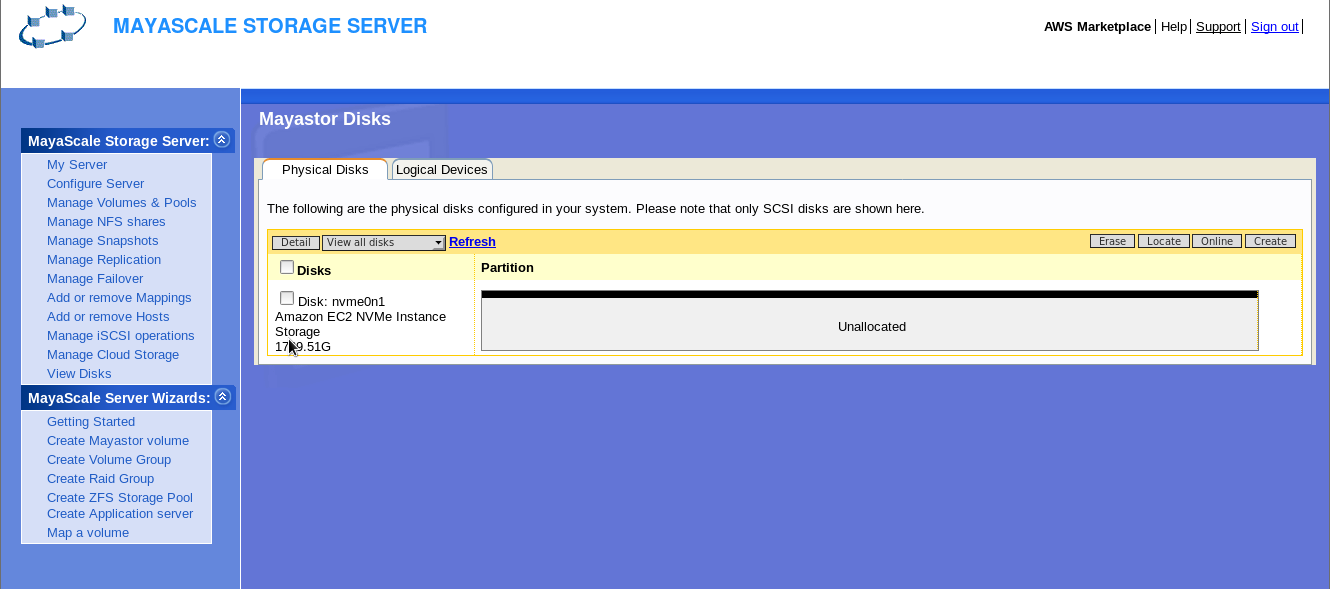
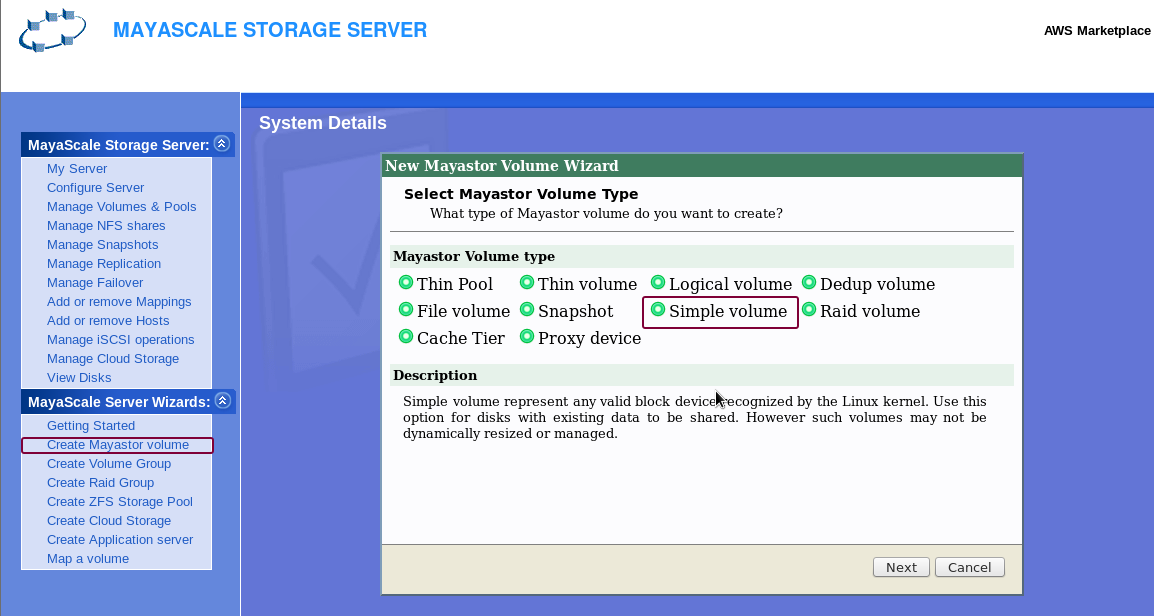
For provisioning NVMe storage to clients you can create volume group from the physical NVMe and slice them as logical volumes for flexible provisioning. But for this guide we will be provisioning the whole NVMe resource to client.
Using Mayascale Wizards → Create Mayastor Volume. Then select Simple Volume

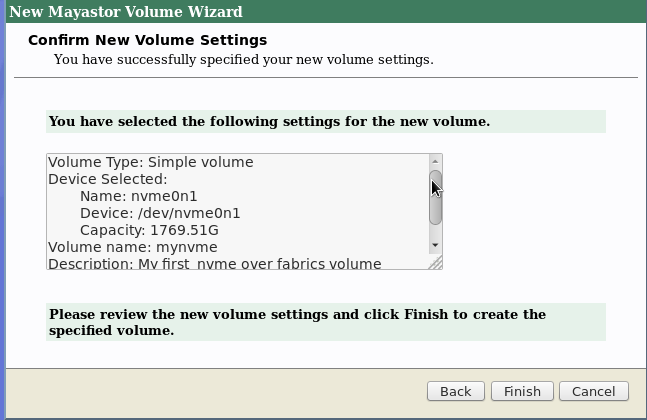

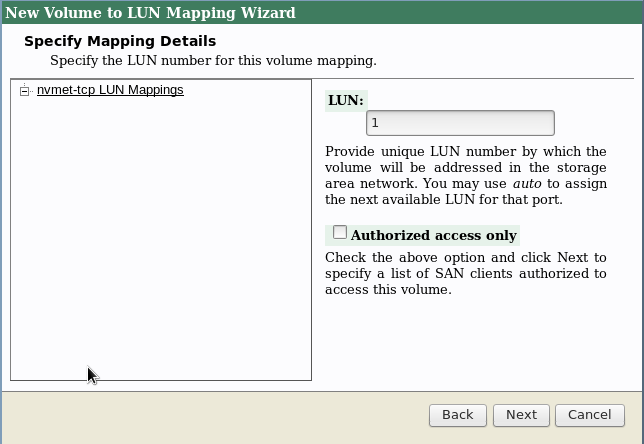
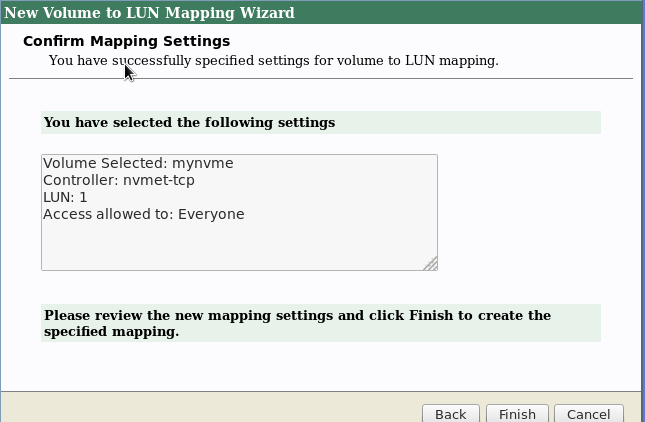
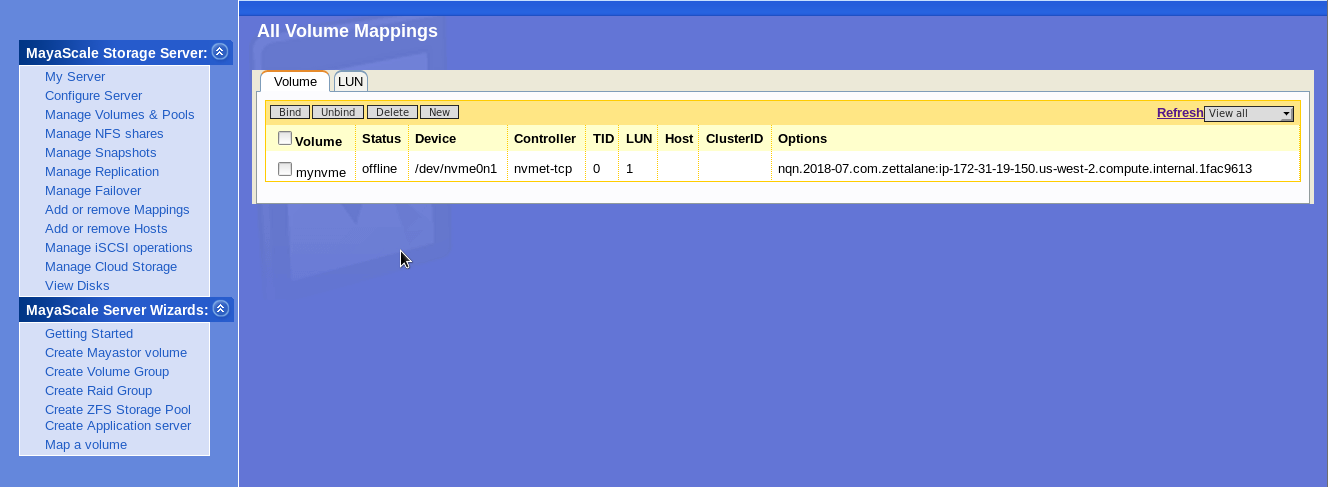
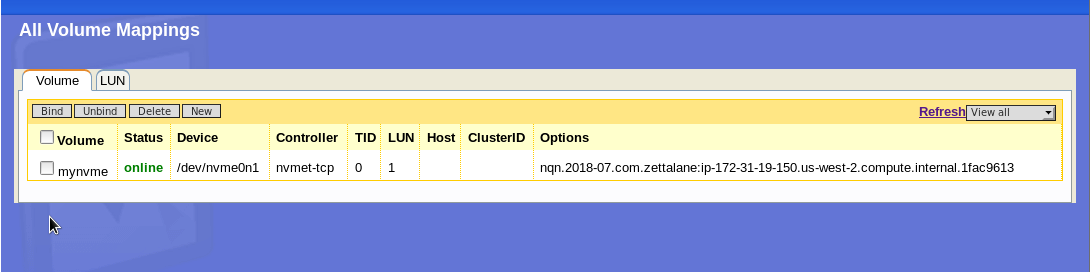
- Congratulations you have created NVMe volume successfully to be discovered by clients as follows